

Last week I admitted I have an obsession with snowmen (here). Living in Florida we will not be building any snowmen any time soon, but many of you are living in snow-covered areas. When I saw “Build a Snowman Kit” on Pinterest I knew I had to make one. Thankfully, my sister lives in an area that does get snow.
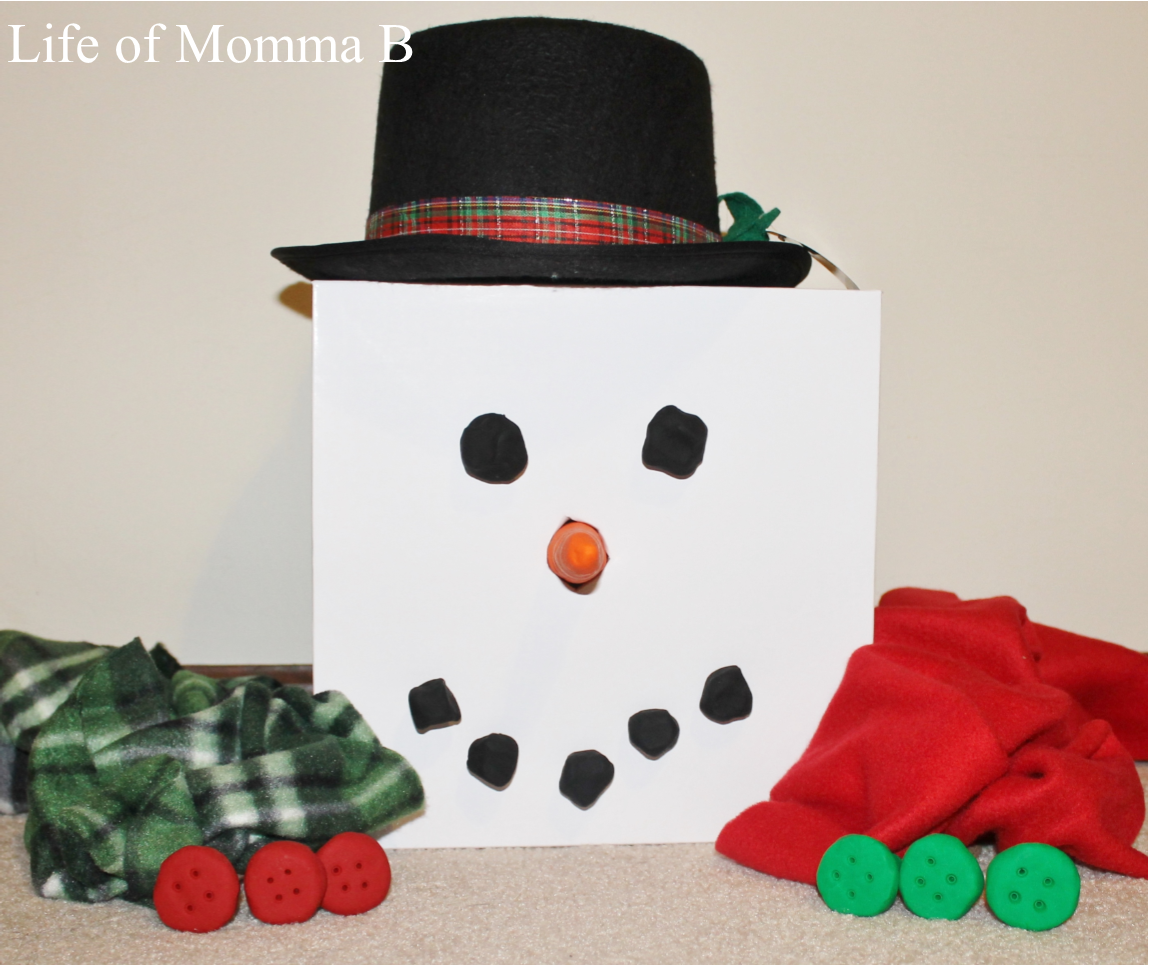 (Please excuse the box “snowman head”, Florida does not get much snow).
The kit was easy to make but I could not get the words to “Frosty the Snowman” out of my head. Corn-cob pipes are not politically correct but I did keep the eyes made out of coal. I guess the buttons could also be for a nose, but I think the carrot is more traditional. I included two scarves and two sets of buttons to allow for some variety.
Supplies: felt top hat (Target $3), fleece, quarter-inch diameter dowel rod, Sculpey Oven Bake Clay, handsaw, sandpaper, cookie sheet, parchment paper, ink pen, and craft knife
Step 1: Cut the fleece into 6 inch wide strips of fabric and set aside.
Step 2: Cut dowel rod into 1 eight-inch piece and 13 four-inch pieces. Only sand one end of each piece smooth (this allows the clay to adhere to the rough end).
Step 3 (nose): Knead 1.5 ounces of orange clay until soft. Form into a cone/carrot on the eight-inch piece of dowel rod. Be sure to leave about 4 inches uncovered. Using a craft knife, carve ridges into the carrot to make it more realistic. Place on a cookie sheet lined with parchment paper.
Step 4 (eyes): Knead one ounce of black clay until soft and divide into two pieces. Shape each “eye” around the tip of a four-inch dowel and set aside. Remember these are not smooth pieces and should be a little rough.
Step 5 (mouth): Knead another one ounce of black clay. Divide into 5 pieces. Shape each piece around a four-inch dowel.
Step 6 (buttons): Knead 1.5 ounces of red clay until soft. Divide into three pieces. Shape each piece around a four-inch dowel rod. Use the point of the pen to create “button holes”. Repeat this with the blue clay.
Step 7: Preheat oven to 275. Bake the carrot nose for 5 minutes then add other pieces to the cookie sheet and bake for another 15 minutes (20 minutes total). Allow pieces to cool on pan.
Step 8: Wait for the next snowfall and build a snowman 🙂
Tip: If this is your first time working with Sculpey Clay, the colors will bleed onto your hands, and you should cover the work surface to avoid staining (parchment paper works great).
