
The group Craft Hope is at it again! They are collecting donations for children in Kenya. So I decided to decrease my stash and knit a dozen or so hats for them.


The group Craft Hope is at it again! They are collecting donations for children in Kenya. So I decided to decrease my stash and knit a dozen or so hats for them.

A new week is here and summer is slipping away. My summer is slammed packed with activities, but I am trying to catch up on sharing some of my older projects. Today I am sharing a hat I made for my niece.

I obtained the pattern from the blog Project Stash. The pattern can be found here.
For this hat I opted to use some Red Heart Super Saver acrylic yarn in “Pretty ‘N Pink”. I loved the pattern of this hat. It knitted up fairly quickly and had just enough variations to keep me interested.
The pattern writer said that it could be made with one skein of yarn. I totally agree I even had enough left over to make a quick headband for my daughter.

In between celebrating my birthday and getting ready to move to Florida, my needles have been busy clicking away.
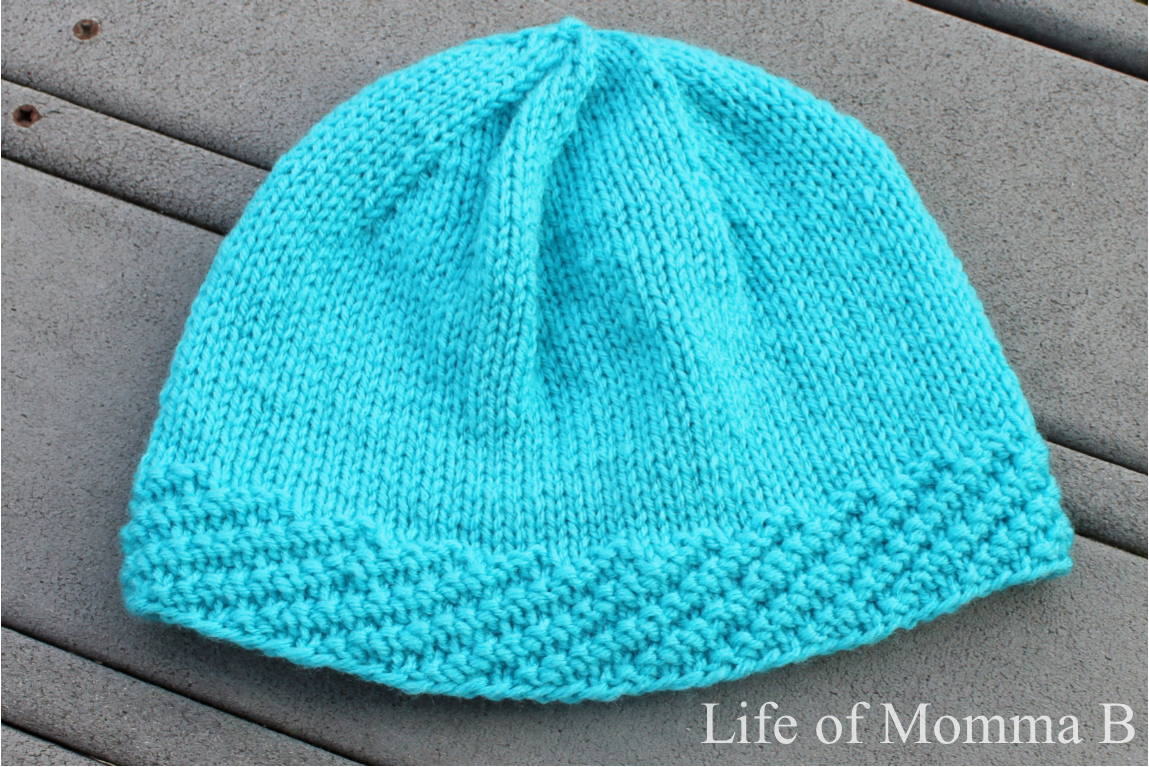
I found this pattern with the help of Pinterest. The full pattern can be found here.
I made this hat (along with a scarf and headband) from a skein of Red Hear Super Saver turquoise acrylic yarn. Unlike a traditional ribbed brim were the rows line up vertically, these are staggered to create a diagonal pattern. I am pleased with the overall look of the hat. However it was a little larger than I had hoped. I made the adult small for my 10-year-old niece’s birthday. While it should fit (based on my daughter’s head) it was not overly snug. If I make this hat again I will use a smaller gauge needle and/or decrease the number of stitches.

What is hope? Merriam-Webster defines hope as to “expect with confidence”. We all need hope, hope that the tomorrow will be a better day. How wonderful life would be if each of us could expect with confidence that tomorrow would be better.
For the past several months I have been following a craft group that uses their talents to do just that. With so many people in the world that are hurting, Craft Hope allows people to use their crafting skills to bring a little hope to the lives of those less fortunate. It is a simple concept really. Periodically a project is announced. People around the world are asked to make a particular item for a charity that will then distribute the items. I finally took the plunge and decided to participate in a project. They are currently collecting hats, scarves and blankets for the people of Romania. To learn more about Craft Hope and their current projects head to www.CraftHope.com
Tomorrow I will be putting in the mail one lonely hat and scarf for a little girl. I know it is not much but believing every little bit helps here is my contribution.

I began with the scarf. Using a #6 pair of needles, I cast on 25 stitches and continued with a garter stitch until it was long enough (about 36 inches).
This scarf brought me extra joy and some tears. For recently, as my father helped to clean out Dobb’s house, he found a pair of my grandmother’s needles that I was able to use for the first time on this project. She has been gone for a little over 15 years now. My grandmother was a spunky lady, full of determination, but she had a heart of gold and was always willing to help. With each stitch I reflected on my memories of her, I couldn’t help but think she would have loved to use her needles for a cause such as this.
Then came the hat. Since I did not have enough of the dark rose to complete a hat, I opted to try my hand at changing colors. I really did not have a pattern per se, but used the basic hat that I had made previously as my starting point. Here is what I did.
Cast on 90 stitches onto a set of size 8 double point needles, and join in the round being certain to mark where the round begins.

Since I am taking a break from dishclothes and working on some different projects, I have tried my hand at a hat. Remember that I only began knitting a few months ago (see First knitting project) and this is my first time to use double pins. It took me a little while to figure it out. but after watching many YouTube videos, I set out to tackle a seemingly simple hat pattern I found at RedHeart.com.
I began with the same turquoise acrylic yarn I used in the scarf. While the pattern used multiple colors, I only used one. The first problem I discovered was the count was off. The instructions say to cast on 90 stitches, then for rounds 1-8 -P1, [K2, P2]. If you do this you will not get the pattern pictured. If you use some basic math skills you will discover that one round is not evenly divided into 90 stitches, round 2 will create a staggered look and the ribs will not line up. So I was forced to modify the pattern and ended with extra knits where the round ended.
I choose this pattern because of its cute beret style. As you can see, mine does not look like that. I had Lily model it and this is what I got. For the record, Lily is 9 so I guess in order for the hat to flop, you would have to make the bigger size for her.

Not quite the look I was going for, but it is finished. I learned a lot from this project. I also made a set of wristlets to match so stay tuned.
