Zebra Bowl

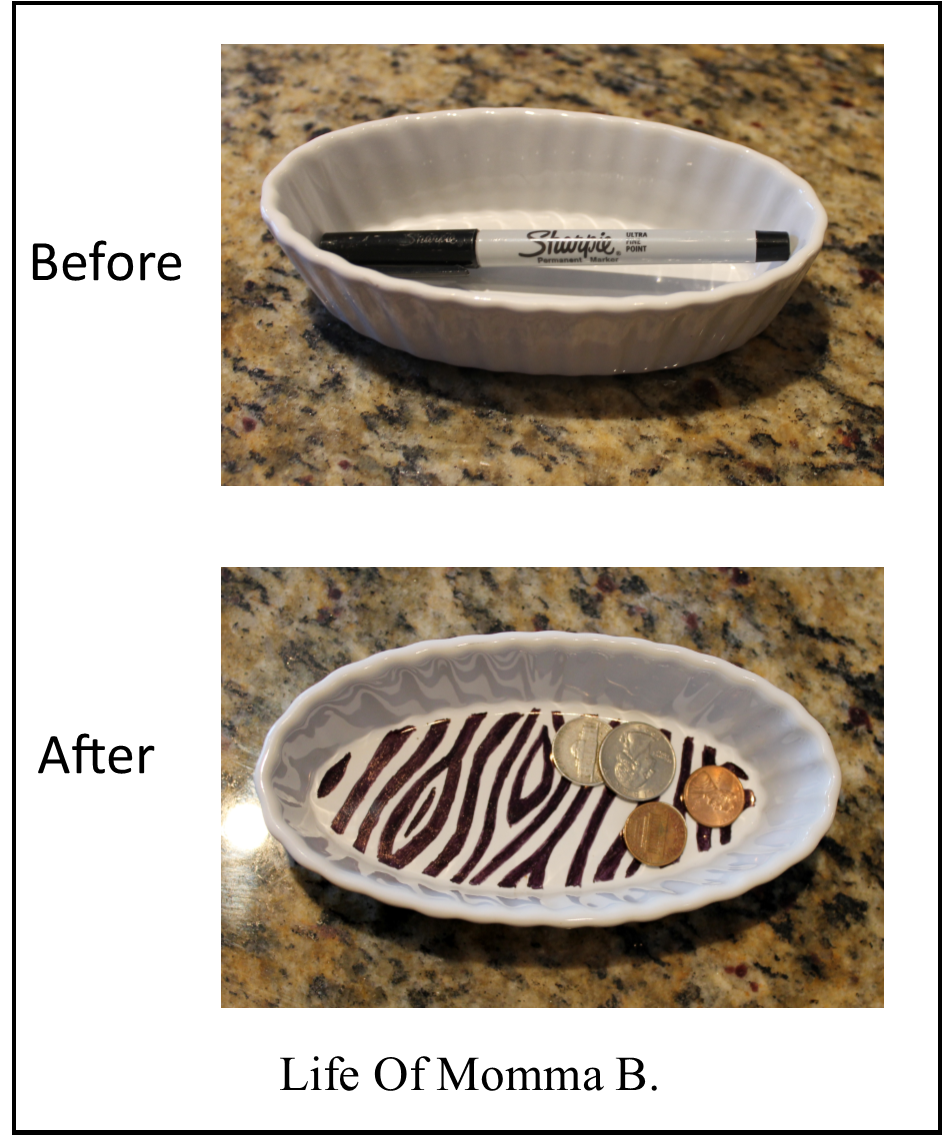
In preparation for our move I am preparing to redecorate the kids bedrooms. Lily has decided she wants a purple zebra room. My first little project for her room was a bowl for her to put little things in such as coins, jewelry or any of the little things she does not want to lose.

It all began with a miniature ceramic dish I picked up at the dollar store. I have seen many projects on Pinterest that used a Sharpie to decorate dishes. After some research, I noticed that there were many complaints that the item did not stand up to being washed in the dishwasher. Since that was not an issue I decided to continue.

Using a fine marker I drew a zebra pattern in the bottom of the dish and then baked it at 375* for 45 minutes. I allowed it to cool overnight in the oven.  The next morning I hand washed it. Lily loves it!

Zebra bowl


The great water bottle solution

As a mother of two active children, we are forever losing water bottles. Looking in the lost and found box is useless, for they all look alike. While getting ready for camp this past year I was determined to be not lose another one.

water-bottle

It began with a bottle I found at the dollar tree (if it did get lost, at least I would not be out money too). Then, I used my Cricut to cut vinyl letters that I then placed on the bottle. It was a very easy project and took very little time to complete.

I was a little reluctant to post this at first, for I wanted to make sure that it would last more than a week. Well, here it is 6 months later and all is well. It not only came home from camp, the letters have remained in place after several washings.

I can not be more pleased. I might have to make a few of these for gifts this Christmas.

Etched Glass

Recently, I had a group of AHG leaders to my house. Being winter time and almost Christmas, I wanted to get each of them a little something. I decided to make coffee cups with their names etched on them.  Below is step by step, how I made them.

.
combo1. I purchased some clear glass mugs from the local Dollar Store.

2. Using my Cricut, I cut each name out of vinyl.

3. Using a product called Armour Etch, I applied a generous coat over the vinyl.

4. After 8 minutes, I rinsed the Armour Etch off and removed the vinyl.

.

Here is another image of the final product. I realize it is hard to see the etching, but I hope it helps.

Etched Glass

TIPS

  • For the names that were too big I used their initials to create a monogram.
  • Make sure the vinyl adheres completely or the image will not be crisp.
  • Be sure to wash each glass thoroughly before using.

Cost

  • 10 mugs from Dollar Store – $10.85 (including tax)
  • 3oz bottle of Armour Etch – $5.86 (after my 40% off coupon, including tax). I used less than half of the bottle
  • Vinyl – free since it was left over from another project
  • Total cost – $16.71 or $1.67 each