

Over the last 8 years I have spent many hours sewing on merit badges. I went back and looked, Lily has earned over 100 merit badges, 45 service stars and countless fun patches. I have always used invisible thread on my sewing machine to accomplish this.
Recently I saw a post on Facebook by Bridget Simmons from WA0722. She did an amazing job showing step by step how she sews on her daughter’s badges. With her blessing, I wanted to share it with you.
Begin with invisible thread in the top of your machine, and any color thread in the bottom. Personally, I like a different color than the vest/sash. It make moving badges easier if ever needed.
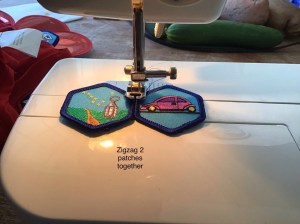
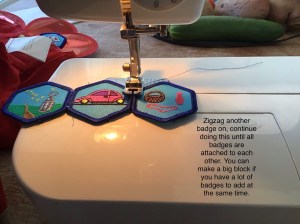
Step 1: Arrange the badges as you would like them to appear. Using zigzag stitches sew them together.

Step 2: Position the block of badges on the uniform.

Step 3: Zigzag around the Fanny Crosby Award. This attaches the center of the ring of badges to the vest.
Step 4: Using a straight stitch, sew around the outside of the ring of badges. 
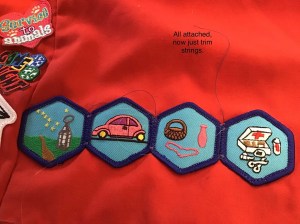
Step 5: Trim stings.


Bridget also showed how she uses the same technique to add badges to the other side of the vest.
As I am working on moving all of Lily’s badges from her old sash to her new longer sash (Thank you AHG for recognizing that the sash was not long enough for Patriots. This could not have come at a better time).
I would like to add that the Girl Handbook specifies the order of badges in the flower that appears on the left side of the vest. The flower is made up of one badge from each frontier. Place the badge from the Heritage Frontier at the 11 o’clock position and proceed in the following order: Family Living, Arts, Outdoors, Personal Well-being and Science Frontier.
